Showing posts with label sewing. Show all posts

Friday, 8 February 2013

valentine coaster

Continuing with the them of trying to teach myself how to quilt, use up the stash and make useful things for the home I decided to make a little coaster. Mr D always uses an old card to put his mug on so I thought a coaster for him would be a perfect start as he actual NEEDS one! Great to make something that is actually needed, it's so nice when a hobby becomes useful :)


I started with some rectangles... a lot of my sewing seems to be based on rectangles just lately for some odd reason. I sewed them together to make 2 squares.


At this point I couldn't find any batting/wadding so in the interests of being green I decided to use up some scraps from the last project...of course as things go I did find some wadding after I'd done this lol...but the 'scrap wadding' acted as a stabiliser anyway so that was good  :)


Then I thought seeing as it was for Mr D and the fabric was mostly red ( which makes me think of romance ) it needed a heart of some sort. Off to the kitchen to find a heart shaped cookie cutter as a template to draw around ;-) Here you can see I hadn't found the wadding yet but I did put a layer of real wadding under the red when I started to sew.


Then I sewed around it, left the actual heart plain to make it stand out...well it already had that pink print on it...and played around with quilting the outside...and "Hey Presto!" it worked!


Here is a pic of the back...You can see it was a sandwich! ...the scraps worked well as a stabiliser...I guessed it doesn't really matter what goes inside as long as you can wash it okay :)


A later view of the back... I attached the second 'red square' I'd made as a back to cover up the hideous mess lol...this is before the binding was added....but after it had been squared up etc...so this and the next pic are possibly out of sequence but I'm sure you can suss out the order I sewed in.


I squared it up with the rotary cutter and quilting ruler...it does look squarer ( is that a word? lol ) than the photo would have you believe :-)

I don't have a pic of it with the binding on but I did bind it with a thin white bias binding which was all I had in my impatience but worked well...Perhaps I'll remember to take a pic of the finished article soon...but you get the gist of it...I think it's cute, certainly doesn't look like it was made from scraps and could make a perfect Valentine's gift. Ah yes and just in case you are interested, the red fabric was from an old 'Next' brand ( I think )  ladies' top ( I bought it from a charity shop with the idea of altering it but never did...well I have now, but not into another top lol ) the pattern was from the outer top and the red was  the lining ...hence the perfect match, yay! :)

Monday, 4 February 2013

January's sewing

Well I've been crafting non-stop through January trying to cut my fabric stash down and at the same time trying to teach myself new things :)

I'm trying really hard to recycle and use up my fabric stash AKA old clothes and no longer used curtains, bedding and charity shop finds. I'm finding it's a great thing to do... it's not only 'green' but while you are teaching yourself if you use stuff from the recycle pile it doesn't matter if you make a mistake, so I'm finding I'm allowing myself to be more adventurous than if I had gone out and bought brand new fabric.

I took the above picture halfway through making a 'Seaside Dinner Mat'. All recyled fabric apart from the wadding. 
  • Polo Shirt = sky
  • Yellow Duvet Cover = sand
  • Turquoise shirt sleeve = sea
  • White skirt = left hand beach hut
  • Childs Duvet Cover = green beach huts
  • Cloud, doors and windows = Old bed sheet
  • Pillow case = Dark blue beach hut
 I did my first real go at quilting with this. It was a lot of fun. As you can see I also did satin stitch waves, they were a test of patience, the thread broke about 10 times on every run, and that is no exageration. Ages ago I bought a box of assorted threads from Argos, they seem to be very poor quality as they continuously break through projects and shed fibres something awful! I know it is the thread and not the machine as no other thread breaks like this in any of my machines and this breaks in each of my machines without fail...so moral of the story, buy named brands you trust when it comes to thread. Mr D said throw them away, but I really don't like to waste things so I put up with the frustration. I wouldn't use them on any 'important' sewing, but as this is a bit of fun and I am just playing and learning it's acceptable....on a plus note, when the bad thead is all used up, they came in a lovely organiser box I can use for other threads so all is not lost lol.

This is after the quilting. Not bad for a first go and for someone who was just winging it and making it up as she went along ha ha. Oh by the way, the cloud I made separately, stuffed and then sewed it on...I thought this made it look extra puffy than if I'd just done flat applique. Can you see that I did little Seagulls? I sewed them in a skinny satin stitch :)

I sewed a strip of rectangles together and cut this up to make the binding. I have slight regrets about cutting it up as I think it would have worked well as a base for a runner for a table...but there will be other fabrics on other days....sigh...


Here is the completed mat with the binding. It looks quite cute and I don't think it looks too 'scrappy'. Over all I am pleased. I had never attempted anything like this before. I have since made another ( with birds on ) and we do use them for every meal time. I don't know why I never used dinner mats in the past...they certainly pretty-up the table and it's so much easier to wash and dry a mat than the whole tablecloth if something gets spilled off the plate!

I've been sewing lots of other things and will post more pics soon!


Saturday, 3 September 2011

Stash bash

My piles/boxes/bags/baskets of 'spare' fabric and things that I want to use for fabric is getting the better of me...it really is outgrowing it's space. Mr D had a sort out of clothes he no longer wears and this of course just added to my pile...I just love some of the prints...didn't love them on shirts but really like them for crafts :)

nice print but didn't like it as a shirt       

I've decided September will be a 'Stash bash month'...I've got lots of sewing projects that need to be done and I haven't had the machine out for ages...also I've seen some gorgeous fabrics in the shops but there is no way I can justify buying any new stuff until I have made a considerable dent in what I have! So...project number one was a bag to store Mr D's climbing shoes :)

I really pleased with it    
 I'm pretty chuffed that the fabric looked so good when it was used on a smaller project and Mr D still gets to enjoy his funky print :) I'm also chuffed that I actually remembered to leave an opening for the cord...so many times I have merrily stitched away on the sewing machine and then found I forgot to leave a gap and had to undo the stitches...it seems I am learning from my mistakes lol.

Nice and roomy
 There is plenty of room for the shoes and maybe even his chalk ball bag will fit too if he wants to store them together.


I had some cord lying around from another project and always have a supply of toggles and fastenings so it didn't take long to complete. I just have to find a use for the remainder of the shirt...perhaps patchwork...I shall add the buttons to my 'button jar' so as much of it can be recycled as possible :)

I hope you are all well and happy out there :)

Dox :)


Friday, 1 October 2010

Owl always love you!

A cushion cover I made for DH the other day. Okay the colours are not very masculine, but he can't complain at the message lol.

Doxie


Wednesday, 28 October 2009

Something I made for MIL

Here are some pics of my attempt at a tutorial Pink Penquin kindly shared with us,
Thankyou Pink Penquin for putting your tutorial up. Your instructions were clear and the images very useful... an enjoyable project.

It has a nice boxy bottom, this is before I ironed it.

Waiting for the top stitching.


I think this was before I put the lining in, it is a bit floppy but I interfaced the back of both lining and outer.


The finished product with a little tissue pouch I made.


...can you believe it, I cut the patchwork out the night before and started the next day at about 7am and it took me until 3pm!!!! Okay so I did have a few frantic phone calls in between from Hagatha who was trying to get to a duckling and her wellie boots but was being kept at bay by a vicious cockerel ( don't ask )...I'm not sure why she rings me at these key moments, maybe it is so someone can tell the authorities how she met her grisly and bizarre end...or maybe it is just because it makes me laugh...okay I know you shouldn't... but it is amusing listening to someone shrieking as they scrabble up on to a trampoline for safety with an earful of barnyard noises in the background...I am quite used to the cry of "It's coming to get me!" by now.


Anyway enough of these oddities and back to crafting. I found I didn't have any batting so I opted for a lightweight interfacing...didn't fancy the idea of trying to get anything stifffer through the 2" opening you have to turn it the right way around...It seems to have worked okay.


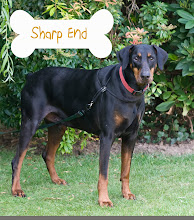
Things I would do differently: Put co-ordinating thread in the bobin so the stitching around the top of the lining didn't jump out at you so much, maybe embroider the plain squares a little before I sewed it together. Apart from that I am very happy. It took longer than I thought, but that may be the distraction of the phone calls and a very lively Sharp End...now he is on anti-inflammatories he is like a puppy again, I have lost count of the number of times I got up to retrieve either the contents of the bin, a pin cushion or some other thing out of his mouth. Oh the trials of a crafter's life. ;o)

MIL now has her little basket,it co-ordinates perfectly with her bedroom decor...it was the minty green that did it. What pleased me is that she saw the patchwork and said...
"Nice fabric, where did you get that?"
This pleased me no end because the fact that it was stitched together in squares had not been obvious, meaning I hope, that my patchwork skills are improving. :o) I gave her the little tissue cozy that is in the picture too and I made another for my friend Line.
Doxie wondering what colour combo to do for her own bedroom :o)

A minute's silence...

Could we just take a few moments to honour my dear crafting friend who left us forever yesterday. He was a great help in many projects and no other came close. We spent many an hour in each other's company and without him my projects would not have taken on such a finished and crisp/fresh look. He could seem a bit heavy at times but I think ultimately that was where his strength was... I liked it best when he really let off steam, it was then that we did our best work together...He will be missed, and yesterday I just could not do any crafting knowing that he was not there to aid me.

Goodbye my Rowenta iron...I am sure your replacement will do it's best, but you will take some beating.

XXX

Little token gift


I often struggle to decide what is and what isn't appropriate as a token gift for someone you don't know well. DS is coming to the end of a course of night classes and I wanted to give a little something to the teacher...last year we gave a flowering plant...this year he is going to give a pocket tissue cozy. My sister gave me one of these a few years ago and I was delighted ( mine has a cross stitch top with my name and flowers embroidered on it) so I am hoping the teacher will be too even though it will not be as fancy as the one I recieved.
I am not entirely happy with the one I have made as the interfacing has creased when I turned it right way out, even ironing didn't totally remedy this ( I think I may have used too heavy a weight/thickness for the job in hand )...if I can find a suitable lining I will run another up omitting the iron-on interfacing.

If I have time I plan to make a matching fabric covered notebook for her too...this will be a first so I either have to find a blooming good tutorial or do some crazy quick pattern making in the short space of time I have.
Edited to say...I made quite a few of these and kept one for myself. :o) They really are better at keeping your tissues decent in your handbag or pocket. :o) so tried and tested 10/10

Doxie :o)

Ruffled Tote: ta-da!


Okay so I just could not contain my excitement and had to jump right in with that fancy bag. Two warnings though...do not start it at rude o'clock because you will be too tired and make silly mistakes such as pressing the handle straps the wrong way, as in width wise instead of length wise ( duh, go figure where my brain was on that one? ) or worse twisting the fabric just before you sew two ends together so you have to unpick it (and by hand because you realise that you left your quick-unpick at a neighbour's last week ...and no I couldn't pop around and get it, remember it was rude o'clock)... All that said, if I hadn't started it before bed I would not have slept a wink; having a new crafting project in waiting for me is worse than a seven year old knowing he is going to Disney Land the next day.


Anyway let me tell you something, after this project you will know your hemming foot very well. You will also have a very tired hand ( from all that hemming )...I have never tired my hands out with sewing before, that was a first LOL.


The bit that takes longest to do is the ruffles...unless you have been blessed by the sewing fairy and are fortunate enough to have a ruffler foot for your machine. ( Mr Doxie if you are reading this, that is something to put on the birthday list :o) grin )


I was a complete twit and did not check my bobin thread before sewing on the first ruffle, there I was, merrily sewing away with no thread in the bottom...it would not have been a problem if I hadn't unpinned as I went along...Thus I had to sit down and pin about 3/4s of it again. Oh well that has taught me to pay attention and not let my impulsiveness ( please translate as enthusiasm ) get me carried away...Oh and something else somehow I managed to get the handles in the wrong place...If the bag had been a square I would have had to shift them by 90 degrees if that makes sense...never mind, I am now a whizz at unpicking !


I toyed with the idea of only having 3 ruffles seeing as I went for very girly print...I wondered if it might be overkill ...ROTFL... look at the fabric, can you imagine? ...The resulting bag is something which would not look out of place at the Moulin Rouge. I'd love to have the guts to embroider a little label for it that says "You think my bag's fancy, you should see my knickers"...but somehow I think one might get some unwanted attention LOL. Anyhow the result is...I am pleased, tickled and definitely going to make at least another 3 of these for 3 very different girly friends.


The things I would do differently next time are; do french seams on the sides ( I did do them on the bottom ), pop a lining in, put a pocket in it for a mobile, and make the boxed bottom wider than the X measurement. I did not put a drawstring on this one as I will probably keep this one for myself and will just use it to tote around bottled water etc on family days out.


Anyone else brave enough to give it a go. It really is not difficult to make...you just need a little patience to get the ruffles right and don't expect to knock it up in an hour. Thanks to Weekend Designer for putting up a pattern and firing up the inspiration. :o)


Doxie

Invasion of the ladybirds

Look out! Here they come

I am sure they are plotting something
... as long as it has nothing to do with my newly planted roses I don't mind...unless it is eating aphids and then they are welcome! I think the one below is the leader.

.
I haven't put flowers and leaves on them all yet as I want to get some different coloured felt so I can make them all a little bit individual. I did one thing differently to the instructions; I did chain stitch in black thread around the bottom of the ladybird instead of just a long stitch as I couldn't get the long stitch to behave and stay where I wanted it to. For details of the instructions look at the link in my previous post.
I know which homes these are going to and I think I will be making some more...they are a fairly portable project... you could easily sit in the car and do these ( not when you are driving of course! lol ) or have a go at some in your lunch hour at work.
VerybigJen came up trumps with these. :o) Thankyou.
Doxie

Visit Pink Penguin: that girl has talent!

This looks like a pretty little thing to give as a gift...I am thinking you could fill it with goodies you made in the same fabric as the basket, how cute would that be?


Also from the same site Pink Penquin is this smashing tutorial on making a pencil/pen case. I don't think I am going to have many problems deciding on what to make for birthday and holiday gifts this year. :o)

The Old Bag Project

Historical stuff really fascinates me...and fashion is such a great window into our ancestors lives...just think in years to come people will probably think it is cute/funny/a sign of our times, whatever, that the majority of mass produced ladies' bags have a tiny pocket for a mobile phone. I am sure when I have looked inside vintage bags the majority of their inner pockets are much wider, but often the same depth...it makes me wonder what they used those pockets for...were they for hairbrushes, combs, powder compacts? Going further back, from what I have seen many designs were simple drawstring designs...I guess the ladies carried them on their wrists, they must have looked very elegant when out walking...maybe this is the thing that brought about the idea of what we tend to think are very or overly, by today's standards, feminine poses if you think about the way you would hold your arm/wrist when carrying one. :o)...I'm wondering if those bags might possibly be a more secure way of carrying stuff when you think about pickpockets...anyway I am waffling now...

Because ( oops I learnt in INFANT school you should never start a sentence with because, sorry Mrs Godfrey, blogging is not good for grammar LOL ) you can vary the style of bags so much I thought I might give myself a little project using vintage bags as a starting point for practicing new techniques. This little selection of bags is quite inspiring. I have a few pieces of crochet I have been wanting to bring into a project and I think this may be the one. :o). Crikey I hope I get to live to 210 years old or I'll never fit in all I want to do!

Doxie feeling quite inspired

For Rip Van Winkle: Bird


Just in case you have been snoozing and haven't seen this yet...is there ANYONE out there in blog world that hasn't had a go at these yet?...well just in case look at link above...You may or may not see my feeble attempt above depending on whether or not I was brave enough to share a pic with you...I once read that a secret to a good blog is to show you are human...well there is proof in my pictures, far from best attempt at embroidery...all I can say is that if you are going to embroider it, do it with a trick marker because if you are like me you will change your idea as you go along as the aesthetics ( crikey spell check said I got that word right first time around, sometimes I impress myself LOL ) of it become more apparent as you stitch...and if you are a complete twit and did not use trick marker, felt tip pen marks do not compliment the embroidery no matter how much you try and persuade yourself otherwise! LOL

I'm going to try and do a mobile as soon as I find some yummy fabric that will do them justice.

Enjoy.

Doxie ...far from perfection!

Old vintage sewing pics on the web

If they were thrilled with this machine, I'd love to show these ladies the new Bernina 830 LOL BTW if you haven't seen it yet, the launch party presentation is well worth a look if you can find it on the web...if I remember I will put up a link sometime...it is somewhat cheesy, quite long, BUT really pulls you in, I certainly wanted one after watching it but seeing as it is £5,700 at the time of writing, I won't be getting one this side of Christmas! ( or the other side lol ).
Awww ain't they sweet!
Is this one of "The Borrowers" practicing recycling? Apparantly that is a rabbit...I thought it was a Red Setter Dog.


Ahem, apparantly not all little girls are sugar and spice!

There are some lovely "vintage" sewing pics out there on the web. I can't give you permission to use these as they are not mine.They were found at the following site...
©2000 Denise Van Patten - http://collectdolls.about.com

Ruffled Tote bag

Weekend Designer has the most gorgeous bag on her site ( I am assuming the author is a she , I read the profile and it doesn't say). Check it out here . Be sure to also check the archives on that site, there is some great stuff to inspire you.I'm sure we all know a girly that would have a fit of frilly vapours if they received something like that as a gift!! That's if you could ever bring yourself to give it away. :o)Ohhhh I wish I lived right next to a fabric shop AND it was open late, I want to make one NOW!Doxie ( off to rumage through my fabric stash )

Rae's top


Okay I finally got around to taking a pic of Rae's top that I made...keep in mind this started out as a muslin, so there is probably quite a few stray threads etc ...but I liked the fabric so much I have made it part of my wardrobe...Next time I WILL take more care. The way I put it on the hanger makes it look a bit lop-sided but luckily that is not how it is when you wear it.
Doxie

fabric book cover links

I really want to make some of these.


Cover for a novel type of book here

Forgotten things in the loft


I was having a tidy in the loft the other day (translate as trying to make more room for my crafting stash and must have more fabric addiction) and I came across a couple of items I had forgotten about. The first is an old UFO ( groan!). It started life as a patchwork bag...I was never really interested in it as a bag though as the challenge was just to see if I could decipher how to make a bag in this design... once I had achieved my goal I lost interest and was on to the next thing...I am rather proud of my pink bullion roses but goodness knows what possesed me to put those hideous blue ones at the bottom for, they are just not working. I can clearly see that my patchworking skills have improved since I did this too, which is encouraging.

Mmm I think I may have uploaded this as too poor a quality to appreciate the bullions...note to self to take a close up of yellow panel at higher quality.


cheery isn't it?
The Sylvester cat was from a home-ed project...the brief was to find a picture of a famous person, copy it and then use it to make a Andy Warhol style painting. I can't remember exactly which site we got the picture from, but I do remember it was a kiddie's site with "tutorials" on how to draw well known cartoon characters. :o) Okay so ours was not a famous person but it was close enough eh?
I did come across another pic that I painted of a couple of my pets, I will keep that under wraps for now as I may make it into an embroidery design at a later date and I don't want to spoil the surprise LOL. Gee dunno when I'll have the time though.
Doxie, who achieved little in the loft that day because she was so distracted by all the interesting ( to her ) finds!

Anti-Jeremy Top for Hagatha

My dear friend Hagatha had an operation a few weeks ago and really needs to wear floaty tops for now and probably a few months more. I bought her a top a few weeks ago but MIL insisted that it was very me...which was weird as I never wear mauve. Anyway I gave in and tried the top on and I am glad and sad to say that it has become one of my favourites...well you guessed...when I saw Hagatha she shrieked

"I love that top, where d'ya get it? "

All us Doxies just fell about laughing at this and I of course, instantly felt guilty and had to fess up! Mind you, she bought me a beautiful zip up jacket at Christmas which never made it under my Christmas Tree, but looks great on her! ;o)

Anyway the anti-Jeremy bit is to hide Jeremy ...which is the name her daughter gave to her condition ( yes nous sommes slightly unhinged here but it was nicer than having to use the medical term ).

Since making one of Rae's tops the other day for myself I could see it would be a perfect disguise for Jeremy so it looks like that is going to be quite high on my list of to-dos. I am not sure how well it will work out taking measurements over the phone though...Our families are on a day out together over the weekend so maybe I should take my tape measure and just ignore the strange looks I get in public as I take her bust and hip measurements LOL.

Doxie.


Edited to say...Oh dear I never made it...but she did recover really quickly so there wasn't such a great need in the end. :o)

Guide to smocking on Tipnut

If smocking is on your to-do list check out Tipnut's guide, it looks very clear. :o)

Doxie

Some girliness for you

This is before it was sewn up so excuse the threads and pin!

How could any girlie not want to stitch up this gorgeous corset pattern from Rectangel? I made a little sachet with mine and filled it with lavender. HOWEVER I was so filled with euphoria and excitement at the result, that when I cut around the edge to shape it and trim the excess felt away, I ...for some reason... failed to see the very obvious ribbon I had carefully stitched on to hang it by and just cut it clean off ! I did remedy it, but what a twit LOL. I think these would be such a hit for pressies.
Be sure to check out the pics in Rectangel's vintage embroidery pattern stream they are lovely.
She's gotta be a very talented person by the look of the pics on flickr.
Doxie